How to Deploy golang to production Step by Step
If you want to use supervisor instead of systemd to deploy and monitor you application you can checkout this article.
Golang is one of the best programming language to work with.It makes everything so easy during deployment as no dependencies or installation are needed.
In this tutorial am going to show you how to deploy a golang application to digital ocean.However you can use the same steps in any environment or hosting service.
Making A simple Go rest api
I assume at this point you have your go application ready but for the sake of clarity lets start by making a very small rest api that will fetch us some jobs.
You can skip this section and jump to the deployment steps.
This will be our project structure.
|
|
The handlers.go - has all the handlers(controllers) we want to hook to our routes
The models.go -This contains all our model definition which in this case is our job model.
The main.go – This is our entry point where we shall serve our application from.
Defining our model
In this simple api we are going to use only one model.That is the job model.But in general an application has many models which may be defined here.
Write the following code in your models.go
|
|
Writing a handler to get our jobs
Now that we have our model its time to write an endpoint that will fetch our jobs.The endpoint will return a json response which we can consume.
Lets go ahead and write our code in the handlers.go file.
|
|
Adding A router to our api
In this tutorial i am going to use the Chi router to handle our routing but feel free to use any router available.
You may check out httprouter or even gorrila mux but it all a matter of preference.
Open you main.go file and paste this code.
|
|
our simple api is now complete test it by running:
go run main.go on the terminal.
If you followed this code to the latter you can visit
http://localhost:8080/api/jobs
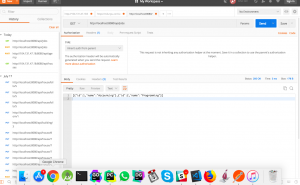
You should see the jobs displayed.

Deploying our go rest api to digital ocean
Now that we have our app ready it is time to deploy it.
I assume that your serve is running on a linux droplet thus i am going to compile our application for linux.It does not matter which machine you are using for development as go allows you to build for any os.In my case i am using macos but i will show you how to use it to build for linux.
Building our app
Cd you project(where your main.go is located )and run this command to build for linux.
|
|
if you look at you folder you will notice that a new file called jobs has been created.
This is the compiled binary file that is needed to execute our api.You just have to upload this binary file to your serve and run it.
Scp this binary file to the server(For instance for my case to upload it to my server i would write)
|
|
Replace the domain name with your droplet domain name or ip address and (/var/www/go) with the location you want to store it.
Writing a systemd file to manage our app
We need a way to stop ,restart and start our app.For this we are going to use systemd which will simplify our job.
You can also use supervisor for this task.
Create a unit file with the extension .service within the /etc/systemd/system directory to begin:
|
|
Inside copy the following script.
|
|
Thats all is needed.
We can now start our script by simply running.
|
|
Now visit the port you configured you go app to use (Which in my case is :8080) your app should be running and ready for use.
Configuring Nginx to Proxy Requests your go rest api
Using nginx with go is not really necessary .However i would advice on using it since it help you to manage security for your application as its very easy to add ssl with nginx.
It is also easier to configure load balancing with nginx
The nginx setup is very simple.
Begin by creating a new server block configuration file in Nginx sites-available directory.
We will simply call this file jobs to keep in line with the rest of the guide:
|
|
Open up a server block and tell Nginx to listen on the default port 80.
We also need to tell it to use this block for requests for our server’s domain name or IP address:
|
|
Replace the port number with the port you used.The server_name should also be replaced with you domain name.
To enable the Nginx server block configuration we have just created,we need to create a symbolic link of our conf file to the sites-enabled directory:
|
|
We can test for syntax errors by typing:
sudo nginx -t
If this returns without indicating any issues, we can restart the Nginx process to read our new config:
|
|
Conclusion
In this tutorial we have seen how to deploy a golang app to digital ocean in linux.However you can user this same setup for any machine or server running a linux distribution.
I hope this tutorial helped you to understand how to deploy a golang app.
You can read more of our golang articles and leave a comment.
Happy Coding
